Maintenance guide: Inspecting and replacing automatic slack adjusters
This is Part One of a two-part story. Click here to see Part Two.
With brakes as one of the top system offenders in the Commercial Vehicle Safety Alliance's 2023 International Roadcheck inspections, making sure that every aspect is operating properly is critical to a fleet's uptime. And to do this, technicians need to make sure that the system's automatic slack adjuster's are working well, as without this component, the force from the air chamber won't translate to slowing the movement of the brake shoes.
Here are some tips on how to inspect and, if need be, replace this important component.
ASA inspections
Drivers may be the first to realize that there’s an issue with a brake, particularly if they experience a ‘soft brake’ or ‘brake fade,’ noted Chris Christiansen, warranty and technical services coordinator at Accuride Corporation. Encouraging them to log lagging brake performance on their driver vehicle inspection reports is a great way to detect potential adjustment issues.
Technicians should also check for symptoms of brake drag, said Gerry Mead, maintenance consultant and former fleet executive. Check for cracked shoes, discolored or cracked drums, and ensure the wheel turns freely.
If that’s the case, the Bendix Service Guide recommends checking that the ASA can move freely when fully released, as well as inspecting the yoke/clevis and link pins.
“If they’re not paying attention or maintaining it properly, the hole where the pin goes through [the clevis] will get bigger,” warned Kevin Pfost, product specialist at Bendix Commercial Vehicle Systems. “Now you’ve got the movement of the clevis but not the slack adjuster.”
The pushrod jam nut should also be tight against the yoke adapter, and techs should check the boot for damage. Make sure the pushrod is not bent, broken, or loose, and sits at a 90-degree angle with the camshaft, said Mike Gerrick, former heavy-duty fleet training specialist at Point Spring & Drive Shaft, a heavy-duty parts and service supplier.
Greasing the ASA is also key, with Accuride’s Christiansen recommending techs grease the adjuster every six months or 50,000 miles. Make sure the new grease is compatible with the manufacturers, or you can risk wearing out the clutch teeth and other internal components of the ASA.
“Be sure to use greases that are compatible with the manufacturers’, otherwise it may have a negative impact on the internal components,” Christiansen noted.
Troubleshooting the ASA
If there’s a problem with the ASA, do not manually adjust it. Each maintenance expert and the CVSA affirmed that techs should only adjust the ASA at installation or when replacing the brake pad lining.
“Every time you adjust the brake and back [the adjuster] off, there are clutches that keep it from backing off on its own,” Bendix’s Pfost explained. “If you’re adjusting the brake once a month, you could damage the slack adjuster.”
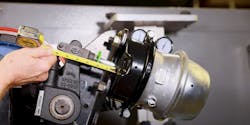
Instead, begin your troubleshooting with a free stroke check, Mead advised. Free stroke is the clearance between the shoe and the drum when the brakes are at rest. To find the free stroke, adjust the shoes so that they touch the drum, then back up the adjuster by turning the adjuster hex one full revolution counterclockwise. Without the brakes engaged, use a pry bar to pull the pushrod out and measure how far the actuator travels, specifically between the chamber face and the center of the large pin.
Generally, the free stroke should be between 3/8-5/8”, but Mead explained that this value is often different from OEM to OEM.
Next, check the brake stroke. The brake stroke is the amount the pushrod moves when the ASA is activated. Depending on your brake chamber size, the pushrod’s required maximum stroke will vary. If the push stroke exceeds this requirement, your vehicle will be put out of service.
Perform an ASA function test to make sure the internal mechanisms are working. First, back the adjuster up a half turn with a wrench. If you feel no resistance or hear a grinding noise when backing up the adjuster, that’s an indication that the ASA is bad, Mead cautioned.
Now leave the wrench on the hex or mark a line on the nut and on the body of the slack adjuster, and cycle the brake pedal a few times at about 30 psi, which should cause the wrench or mark on the nut to turn clockwise as the ASA moves the shoes back toward the drum.
If the ASA passes the function test but does not meet the stroke limit, check the foundation brake for worn cam bushings, and make sure the clevis and clevis pins are not seizing or broken.
Replacing the ASA
To avoid mistakes when installing slack adjusters, techs must verify if they’re working with a vehicle that has a clevis welded to the pushrod (the adjuster won’t come with a clevis) or not. Accuride’s Christiansen also noted that techs should always follow OEM installation instructions. Don’t skip installation steps or try to reuse old ASA components with the new one.
“[Techs] want to leave the old clevis on, so they just remove the body of the adjuster. Then they take the new clevis off of the one that they just purchased, which is throwing money away in my opinion,” Christiansen argued. He also noted that techs shouldn’t use any impact on the adjusting hex, such as an air gun, because it could damage the clutch internally. Use a ₇/₁₆” socket wrench long enough to turn the adjuster hex counterclockwise.
To adjust the ASA after installation, rotate the adjustment hex clockwise until the lining is against the drum. De-adjust the brake by rotating the hex one-half to one revolution counterclockwise, listening for the normal ratcheting noise.
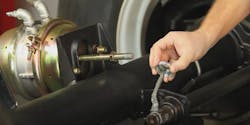
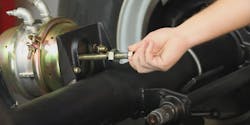
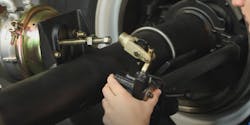
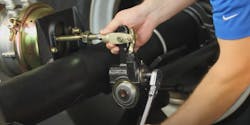
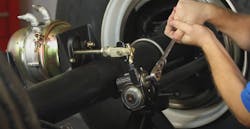
Slack adjuster replacement process
About the Author

Alex Keenan
Alex Keenan is an Associate Editor for Fleet Maintenance magazine. She has written on a variety of topics for the past several years and recently joined the transportation industry, reviewing content covering technician challenges and breaking industry news. She holds a bachelor's degree in English from Colorado State University in Fort Collins, Colorado.
